Sous Vide Duck Breast
In our experience, duck breast cooked sous vide style has consistently been the juiciest and most tender we’ve ever tasted. The sous vide method simplifies the cooking process and perfectly seals in all the juices. This technique results in a flavor that’s simply unparalleled by any other cooking approach.
What is the sous vide method?
In our kitchen, we’ve embraced sous vide, a cooking method that’s all about gentle precision. This method is a slow and steady race, often taking a few hours, but it’s foolproof for getting everything just right.
In this recipe, we start by vacuum-packing the duck breast to seal it completely. We then submerge it in a water bath set at a specific temperature (in this case, it’s 134°F for at least 45 minutes). Unlike the fierce heat from grilling or roasting, sous vide cooks the food evenly and slowly. And to finish off, we give the food a quick sear for that delicious look and texture. We’ve found this technique super handy for ensuring our dinners are delicious every single time.
If you don’t have a vacuum sealer, you can use ziplock bags instead, however you will need to try to get as much air out as possible. As you put your duck breast into the ziplock bag, seal the bag but leave the last inch open. Slowly lower the ziplock into a pot of room-temperature water. As you lower the bag, the water pressure will push out the air from the bag. Try to remove as much air as possible.
The advantages of sous vide
We favor sous vide for duck breast due to its foolproof approach to achieving exquisite results. An added convenience is the ability to cook the duck the night before. Just a quick searing in the pan right before serving yields a beautifully cooked duck requiring minimal effort.
Here are the top reasons why we prefer the sous vide method for duck breasts.
- Precision cooking: Sous vide allows for precise temperature control, which is crucial for cooking duck breast to the perfect level of doneness. This method eliminates the guesswork and consistently yields perfectly cooked meat.
- Enhanced flavor: By cooking in a sealed bag, flavors and juices are locked in, enhancing the natural taste and tenderness of the duck breast. This results in a more flavorful and moist dish compared to traditional cooking methods.
- Reduced risk of overcooking: The controlled temperature of the water bath ensures the duck breast cannot exceed the desired internal temperature, significantly reducing the risk of overcooking.
- Stress-free cooking: With sous vide, there’s no need to monitor the cooking process constantly. Once the duck breast is in the water bath, you can set it and forget it until it’s time to finish with a quick sear.
- Better fat rendering: The longer cooking time at a controlled temperature helps render the fat more effectively, resulting in a more succulent and flavorful piece of meat with a better texture.
- Consistent results: Whether you’re cooking one duck breast or several, sous vide delivers consistent results every time, making it ideal for both home cooking and professional kitchens.
- Flexibility in cooking time: Sous vide is forgiving regarding cooking times. While there is a minimum time required for the desired doneness, leaving the duck in the bath a bit longer won’t harm its texture.
- Easy to scale: This method is excellent for cooking for a large group because you can cook multiple duck breasts simultaneously without additional effort.
Perfecting the skin
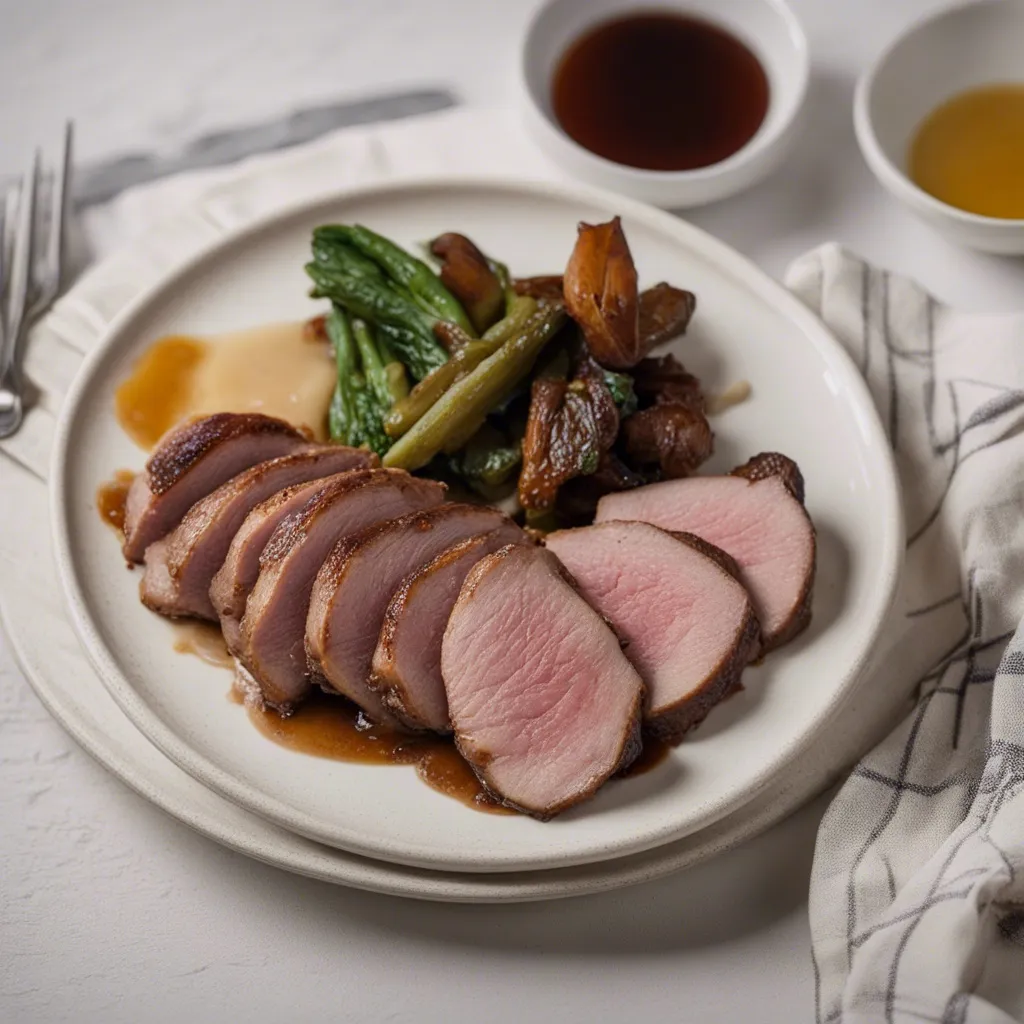
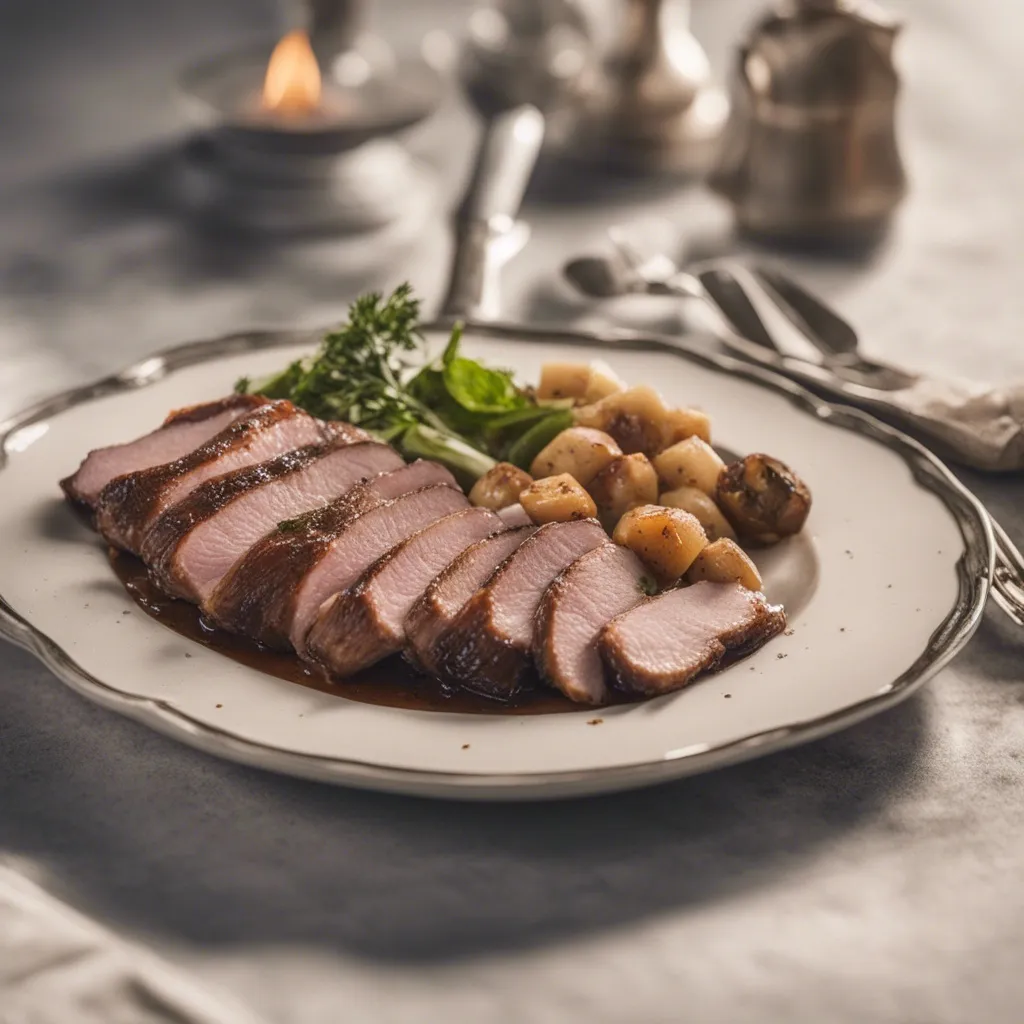
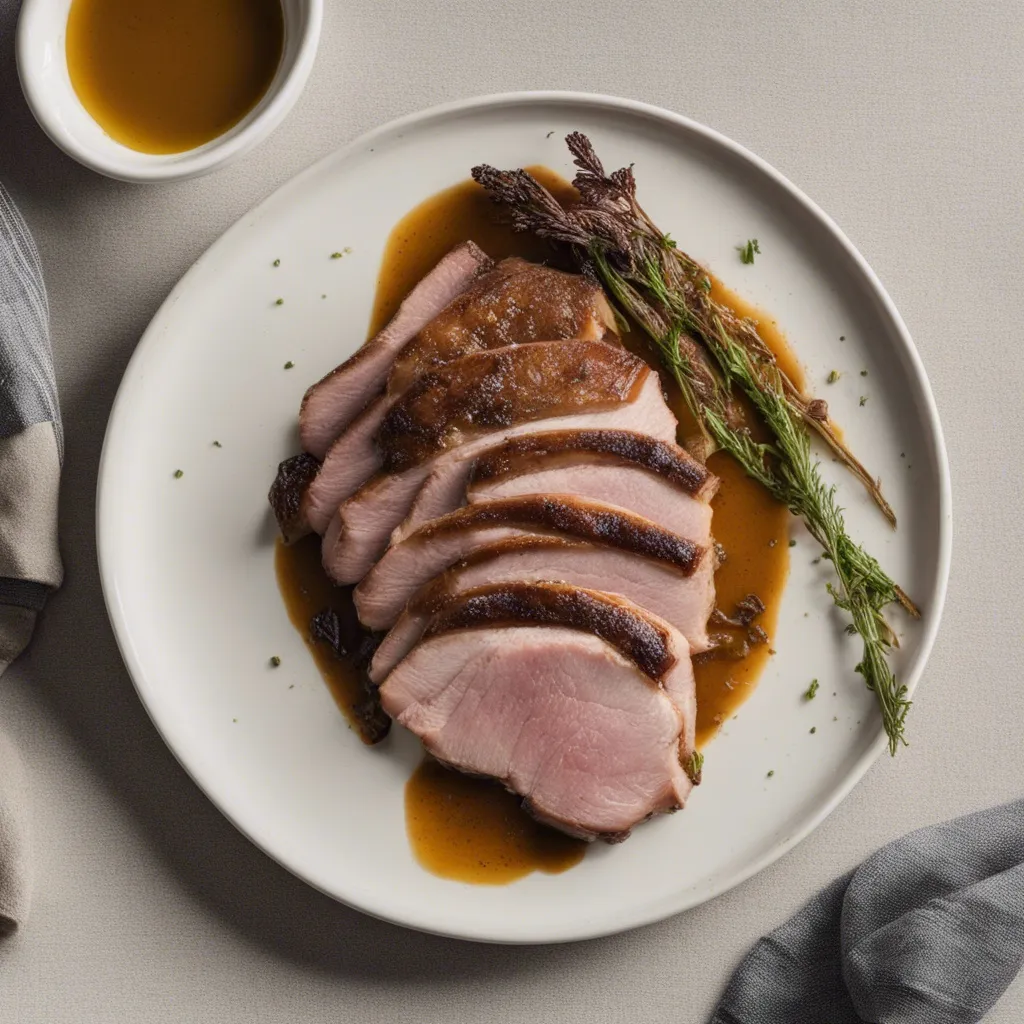
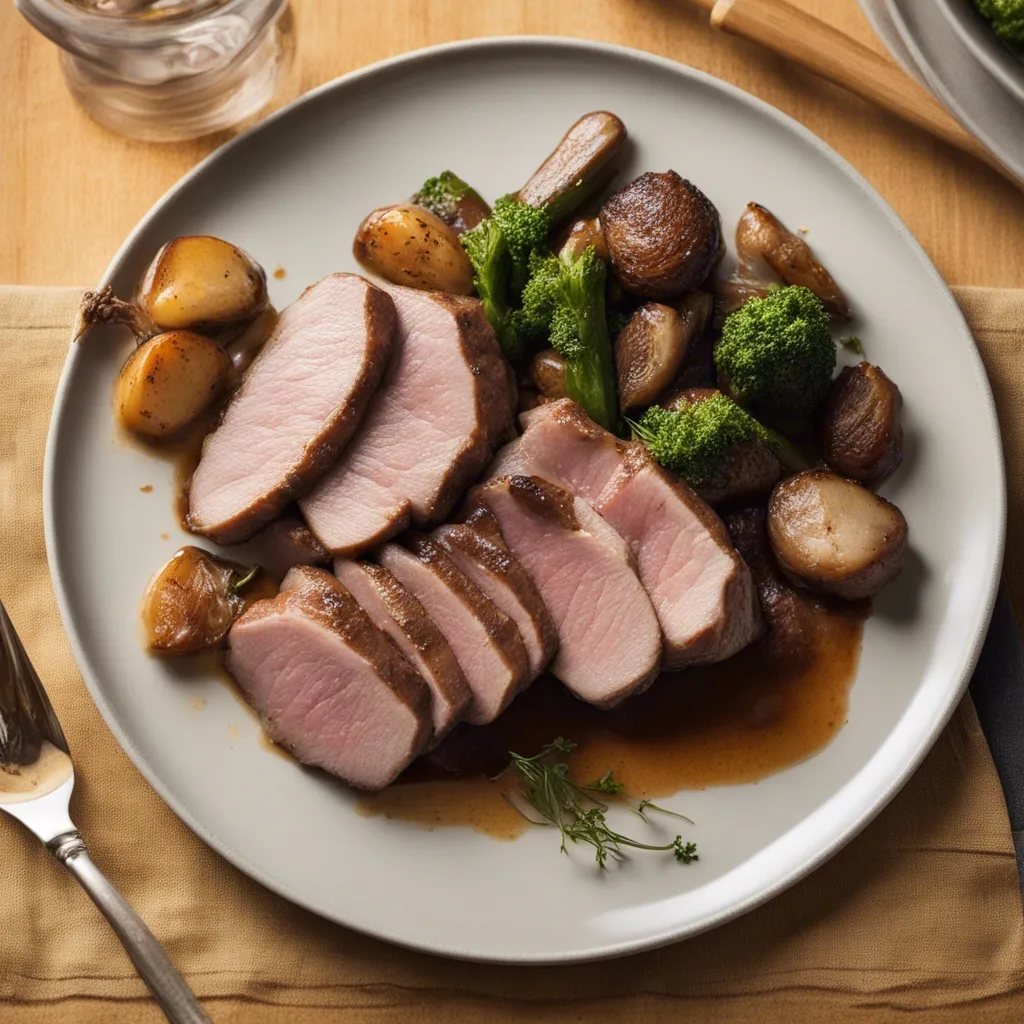
After sous vide cooking, we pan-fry the duck breast skin-side down to achieve that coveted crispy texture. The thick skin allows for this without altering the perfect cook of the meat, leaving us with an impeccably cooked duck with incredibly crispy skin.
Serving your duck
We’ve got a perfectly cooked duck breast, but what can we serve with it to make it truly special? Well, we have a few ideas;
- Roasted vegetables: Try carrots, parsnips, or Brussels sprouts, seasoned and roasted until caramelized. Their natural sweetness balances the richness of the duck.
- Mashed potatoes: Creamy, buttery, and smooth, these are a classic pairing. Add a touch of garlic or herbs for extra flavor, and if you want to have a truly indulgent meal, try our truffle mash recipe.
- Sweet potato puree: A hint of sweetness and a velvety texture make this a delightful accompaniment to the duck.
- Sautéed greens: Greens like spinach, kale, or Swiss chard, lightly sautéed with garlic and olive oil, add a fresh and healthy element to the dish.
- Wild rice pilaf: Offers a nutty flavor and a hearty texture, which pairs well with the juiciness of the duck.
- Caramelized onions and apples: Their sweetness and slight tartness perfectly match the duck’s savory notes.
- Orange sauce: A zesty and sweet sauce that’s a classic with duck, bringing a bright and tangy dimension to the dish.
- Berry reduction: A sauce made from raspberries or blackberries, adding a touch of fruity sweetness and acidity.
- Balsamic glaze: Drizzle this over the duck for an enhancement of sweet and sour flavor.
- Polenta: Creamy and soft, polenta serves as a comforting base for the rich duck.
- Couscous with herbs: Light and fluffy, mixed with fresh herbs like parsley or cilantro for a refreshing touch.
- Grilled asparagus: Grilled until tender-crisp with a hint of smokiness, adding a nice contrast in texture.
- Red cabbage slaw: Adds a crunchy and tangy element, providing a refreshing palate cleanser.
- Ratatouille: A medley of Mediterranean vegetables stewed together for a flavorful and colorful side.
- Quinoa salad: A light and healthy option, it can be customized with herbs, nuts, or dried fruits for added flavor.
Is it okay to refrigerate the duck breast overnight?
Definitely! There are two ways to store the duck. For uncooked storage, season the duck and seal it in a ziplock bag as soon as possible and keep it in the fridge. This keeps the duck fresh for an extended period, but always refer to the original packaging for specific storage guidelines.
You can also cook the duck breast a day ahead. After sous vide cooking, cool the vacuum-packed duck in an ice bath to prevent further cooking. Once cooled, refrigerate it. It's best served within 1-2 days of cooking. For serving, just open the bag, pat the skin dry, and crisp it in a pan over medium heat for about 5 minutes.
What sides can I serve with duck breast?
When we're in the mood for something comforting yet easy to whip up, our go-to is sliced duck breast paired with a steaming bowl of noodles. It's the perfect weeknight treat that feels special without too much fuss.
Roasted vegetables and potatoes are also a fantastic choice. They add a lovely sweetness that complements the duck's savory notes. And then there's the classic mashed potatoes – creamy, buttery, and oh-so-delicious with a drizzle of the duck's cooking juices.
Sous Vide Duck Breast
We've yet to encounter duck breast as succulent and tender as when it's prepared using the sous vide method. Not only does this technique simplify the cooking process, but it also perfectly seals in all the juices.
Cuisine
Chinese
Serves
2
Prep
5 mins
Cook
2 hrs
Total
2 hrs 5 mins
Calories
46 kcal
Ingredients
1 duck breast
¼ teaspoon kosher salt
¼ teaspoon pepper
Instructions
Season the skin side of the duck breast with salt and the flesh side of the duck breast with salt and pepper.
Vacuum pack the duck breast. If you don’t have a vacuum sealer, you can use a ziplock bag (see notes).
Place the vacuum-packed duck in a water bath at 134°F for at least 45 minutes and up to 2 hours. In this case, we recommend leaving the duck for 2 hours since the longer you leave the duck, the more the fat will render and the juicer it will become plus it will be easier to crisp in the pan.
Pat down the duck with a paper towel until completely dry.
Cook the duck on the skin side in a pan on medium heat for 5 minutes until the skin is crispy. Then flip it and cook it on the flesh side for 30 seconds.
Let the duck stand for 5 minutes before serving.
Notes
If you do not have a vacuum sealer, no worries! You can also use a ziplock bag. Start by placing the duck in the ziplock bag. Seal the bag but leave the last inch open. Slowly lower the ziplock back into a pot of room-temperature water. As you lower the bag, the water pressure will push out the air from the bag. Try to remove as much air as possible before putting the vacuum-packed duck in the water bath.
Nutrition
- Calories 46 kcal |
- Carbohydrate Content 0.2 g |
- Cholesterol Content 28.1 mg |
- Fat Content 1.6 g |
- Fiber Content 0.1 g |
- Protein Content 7.3 g |
- Serving Size 1 portion |
- Sodium Content 175.9 mg |
- Sugar Content 0 g |
About the author
Emma Donin is the culinary maestro behind this blog that serves as a melting pot of global cuisines and gastronomic adventures. Her culinary journey began in her grandmother's kitchen, where she learned the fundamentals of cooking and the importance of using fresh, quality ingredients.
